
Here’s a lovely short walk from Hathersage along the River Derwent, then up towards Offerton Moor to enjoy the scenic landscape of the Derwent Valley and surrounding hills.
Hathersage is a beautiful little village in the Derbyshire Peak District. It’s a perfect location to start and finish a walk as there are many facilities there, from shops to cafes and pubs. Are you tempted yet?
Our walk begins from Hathersage car park and then takes you on a mini detour to one of the walk highlights. Then you head over the Leadmill Bridge across the River Derwent and enjoy a pleasant walk up the river.
Once you reach the stepping stones, (feel free to cross the river for fun), you head uphill towards Offerton Moor. This is the main uphill section of the walk but it’s worth it for the views of the valley from the top. You’ll then walk through some small woods and back across the bridge to Hathersage.
Here you will find details on how to get to the start of the walk in Hathersage, route information, a map, a GPX file, plus a step by step instructions for the walk.
Let me know in the comments if you’ve done this Hathersage walk and what you think!
Buy a printable/downloadable PDF route guide for the walk here.
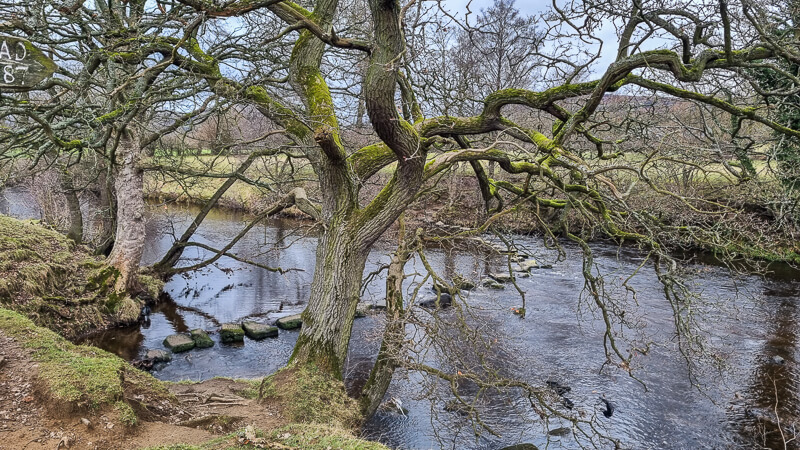
River Derwent from Hathersage

Walk information + GPX
Walk type: Short Circular Walk
Distance: 4.8 miles/7.7 km
Walk time: 2-3 hours
Total ascent: 182 m/597 ft
Highest point: 254 m/833 ft
Walk highlights: Views under the viaduct, Leadmill Bridge, River Derwent, stepping stones, views of the Derwent Valley from Win Hill to Higger Tor
Trigs: 0
Ethels: 0
Stiles: 1 (stone stile)
River Derwent walk map

© Crown copyright and database rights (2024) OS 002572460
Click for online map
Walk start point

Start grid reference: SK 23131 81386
Car parking address: Oddfellows Road Car Park, Hathersage, S32 1DU – Google location
This is a medium-sized pay and display car park, but it can fill up at peak times. Costs are for peak times between 8 am to 6 pm. You can pay cash, card or via the PayByPhone App (worth downloading if you visit the Peak District often as there are several car parks on it). Location code 806374.
- £1.50 up to 1 hour
- £2.50 up to 2 hours
- £3.80 up to 3 hours
- £5.00 up to 4 hours
- £6.00 all-day
*Prices correct at the time of writing
Public transport
Nearest train station: Hathersage train station (This is a short walk from the car park where we start the walk from).
Facilities on the walk
There are no public toilets in the car park; however, if you walk out of the rear of the car park into Hathersage village there are public toilets on the main road.
In Hathersage, there are plenty of pubs, cafes, and shops that are worth a visit after your walk.
Other useful information
There are sections of this walk that can get muddy (especially in the wetter months) so good hiking footwear is essential.
Please keep the Peak District beautiful and respect everyone who uses the park. Take ALL your rubbish home to dispose of and remember close gates (as you found them). Thank you so much.
Would you know what to do in an emergency situation?

We have a guide with what to do, who you need to call and also some useful kit that should be in your backpack. Ask us any questions in the comments or via our social media.
Happy hiking + stay safe
read herePeak District weather
Check the weather for your walk location and hills. We’d recommend that you check a few resources and for hill walks look at the weather conditions in the valley and on the hilltop as they can greatly vary.
- BBC Weather for Hathersage
- Met Office weather for Hathersage
- Met Office weather and/or MWIS (Mountain weather information service) for the Peak District
Ordnance Survey walk map
The map for this walk is the Ordnance Survey OL1 – Peak District (Dark Peak Area).
View the different prices here with Ordnance Survey or Amazon. If you’re hiking in all weather the Active OS maps are good to have as they are laminated so better on rainy days.
View both Peak District map options here.
And don’t forget your compass, I recommend the Silva Expedition or the Silva Classic compass.
For online maps, I recommend OS Online App (I have been using it for many years and it is worth getting if you want to start walking more). Check prices here for the one-month or annual option with OS Online App. All the walks on the website are created using OS Online + you can download them to the App.
See both maps that cover the Peak District here.
Want to learn more map skills? Check out our Guided Walks with map reading skills here.
River Derwent short walk route
Stage 1 – Hathersage to Leadmill Bridge
Distance: 1 mile/1.6 km
Grid reference SK 23131 81386
1. From Oddfellows car park in Hathersage, walk out the car entrance/exit and turn right down the road. At the end, turn left and cross over the road when it’s safe, turning right at the next side road (the opposite direction to the station).

2. Walk down the road and go under the railway bridge, as the road bends around to the right you’ll see a footpath on the left, signposted Leadmill (photo above). But first, continue walking around as there’s a short pretty detour to do. Walk another 50 metres to The Music Mill building, turn left here, and go through the small gate. From here you can see the viaduct and stream running underneath, which is a pretty sight 🙂
3. Now retrace your steps back to the signpost for Leadmill. Walk down this footpath, through a couple of small gates until you come out at the road.

Stage 2 – Leadmill Bridge to River Derwent stepping stones
Distance: 1 mile/1.6 km
Grid reference SK 23345 80653
4. At the road, turn right and go across the bridge. Immediately after you’ve crossed, take the footpath on the right signposted for Shatton which runs alongside the River Derwent. You’ll reach a small wooden gate through a stone wall that leads you into Goose Nest Wood. Follow the diverted path up through the woods and back down to the path alongside the river. (This section was extremely muddy when I walked it).

5. Once back by the river, walk along and then go across the small wooden bridge (photo above) and keep walking with the river on your right. You’ll go through seven small gates until you reach the River Derwent stepping stones, next to a tall fingerpost sign, (signposted for Castleton, Hathersage, Shatton, and Offerton).

6. At this point you will turn left, following the signpost towards Offerton and this is where there’s a chunk of uphill ahead! You may wish to stop and play on the stepping stones before you head off.
Stage 3 – River Derwent Stepping Stones to near Callow Wood
Distance: 1.6 miles/2.6 km
Grid reference SK 21715 81533

7. Begin your walk uphill, heading through the first gate and onwards to a second then a third nearer the top of the field. This brings you out onto a track (photo below) where you walk up to a wide wooden gate that brings you out to a road. Turn left and follow the road as it zig-zags to the top. From here, you’ll now turn left and follow the road, it flattens out so there’s a chance to catch your breath. The views are stunning you can see all the way from Win Hill and Bamford Edge to Stanage Edge and Higger Tor.

8. Walk along until you reach a tall fingerpost and turn left off the road. Continue on the faint path as it goes through some trees and out at a small wooden gate, then down to meet a track.

9. Turn immediately left here, past the house, and through the wooden gate (photo above) that now takes you downhill to a second gate in the woods. Follow the path through the woods and out via a small gate (next to a wide gate) and continue to a second wide gate that brings you out at a road.
Stage 4 – Near Callow Wood to Hathersage
Distance: 1.2 miles/1.9 km
Grid reference SK 22475 80736

10. Turn right, following the green public footpath sign and walk up the road. Look for a small wooden gate on your left (photo above) and follow the path downhill toward the edge of the woods. Here you’ll reach a wall with a stone stile taking you over the top (sorry there’s no dog-friendly option). Walk down the steps and follow the footpath as it brings you back out to the path you started on.

11. Go through the stone gap and turn left over Leadmill Bridge (option to detour first to The Plough Pub which is up the road before you go over the bridge).
12. Walk back up the road, keep to the left side which has pavement go under the train bridge, and after taking the second right turn you’re back at Hathersage car park.
To visit Main Street in Hathersage walk through the car park down the footpath which leads you past the church to the road.

Ask me questions about this walk in the comments below.
Buy a printable/downloadable PDF route guide for the walk here.
Other walk information
More walks in the Peak District
Love the walks in the Peak District? You might like these short walks.
- Rowtor Rocks + Stanton Moor Trig Walk From Birchover | 4.5-Mile Walk
- Magpie Mine Short Walk From Ashford-in-the-Water | 5.5 Mile Route
- Baslow Edge Short Walk From Curbar Gap | 3-Mile Route
Or search all our Peak District walks here
Peak District Walks is a FREE online resource. Are you enjoying the walks? You can say thank you and buy me a coffee here. Thank you very much 🙂
Peak District charity patches
Read about the charity here.


Charity Patches

Charity Patches

Charity Patches

Charity Patches

Charity Patches

Charity Patches
Need more help planning your Peak District trip?
Join our Peak District walks Facebook page, follow us on Instagram and Twitter for inspiration.
More information on the Peak District, including transport options, where to stay, best Peak District pubs + other useful resources.
Check out the 7 YHAs in the Peak District and find the best walks direct from your accommodation.
Find out what maps you will need for your trip here.
Top tips - Read our useful guides on hiking tips here.
Guided Walks with an introduction to map reading (see dates here).
Visit our hiking recommendations page, (footwear, clothes + kit).
Or get in touch and I will help as best I can :).
Please note 'Peak District Walks' accepts no liability for any injuries or accidents resulting from walking our routes. We always recommend you wear appropriate footwear to avoid injuries and to take a paper map and compass on your walks. Read more here.
*Peak District Walks participates in the Amazon Services Associates Programme, as well as other affiliate programmes. If you purchase through these, Peak District Walks earn from the qualifying links. This is at no extra cost to you. Read more here.